If you’re looking to add some cool visual effects to your GoPro videos, consider using these GoPro time-lapse settings. Time-lapse photography can create an interesting and unique look for your footage, and it’s easy to do with a GoPro.
To get started, go into the camera settings and select time-lapse mode. There are a few different options to choose from, so experiment until you find the setting that gives you the results you want. You can also adjust the shutter speed and frame rate to customize the effect further.
Once you have everything set up, start recording your video. The camera will automatically take a series of photos at the set interval, which will then be combined into a video file. The end result is a sped-up version of what actually happened, giving your video a cool “hyperlapsed” look.

Gopro Time-Lapse Settings: What You’ll Need to Take a Time-Lapse Video
GoPro introduced the time-lapse mode with the HERO4 cameras, so you’ll need a HERO4 or newer GoPro. You’ll also need something to keep the camera in one place.
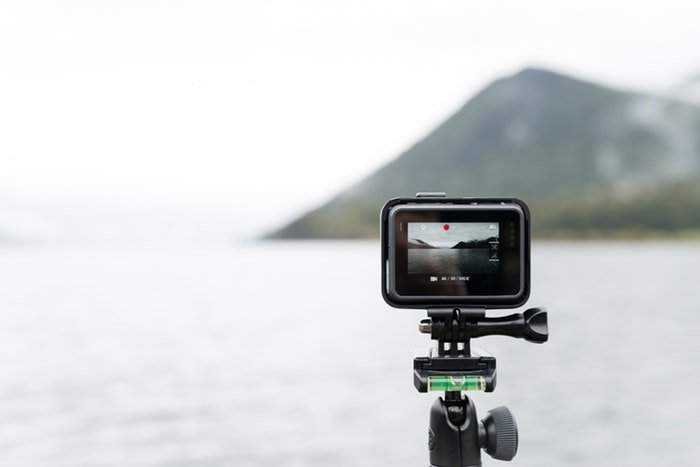
The GoPro doesn’t have to stay completely still. It is an action camera, of course. But it should remain from the same point of view, such as a helmet or chest mount. If you don’t want the camera moving with the action, or you’re not recording action at all, you should use a tripod. A tripod set-up is ideal for things like shooting a sunset time-lapse.
Besides a mount, other accessories are optional but can be helpful. A BacPac will help record longer time lapses on the HERO 4. Some models also need waterproof housing if the camera will be getting wet.
Time-lapses will tie up the GoPro for a few hours. You should have a fully charged battery and a microSD card with plenty of space left.
How to Shoot a GoPro Time-Lapse Video
While similar, each GoPro model may have a slightly different process for setting up a time-lapse video. We’ve outlined the general steps for setting up a GoPro time-lapse. If you get stuck, consult the user manual for your specific model.
1. Select Video Mode.
Using the mode button on the front of the camera, select the video option. Press the mode button until the video mode shows on the front screen. (The mode button is the one on the front for older models, but is located on the side of the HERO8.)
2. Change the Video Mode to Time-Lapse.
Once in video mode, access the video settings using the set-up button on the side or on the touchscreen (on the HERO8). Tap the mode option and select the time-lapse video.
On the HERO8, you’ll see more options than time-lapse. A TimeWarp is a time-lapse that uses the camera’s stabilization system. Use this option if the camera will be moving at all during the recording.
Night Lapse is a time-lapse mode designed for night photography. Use this mode whenever you are recording a time-lapse with limited lighting. The time-lapse mode is the traditional time-lapse that’s also found on earlier models. Use it if the camera is tripod mounted and won’t be moving during the time-lapse.
3. Choose the Interval Settings.
Tap the icon to go back to the main menu. Under the mode, choose the interval option. By default, GoPro will snap a photo every half second and turn those photos into a video. However, you can change the interval, or how often the camera will take a photo. The longer the interval is, the faster time will appear to go by, and the shorter your resulting video will be.
GoPro time-lapses use a 30 fps frame rate. That means you’ll need 30 photos for one second of video. Using this information, you can calculate how long the time lapse will be. If you set the time lapse interval at 30 seconds and shoot for two hours, you’ll end up with 240 frames, or an eight-second video.
A common beginner’s mistake is to set the interval too high, resulting in a time lapse video that’s too short. Choose a slightly shorter time lapse interval than you think you need, or shoot for a longer period of time so that you have more time lapse video to work with.
4. Mount the Camera and Press the Shutter Button to Start Shooting
With the settings in place, mount the GoPro on whichever mount that you’ve chosen. Use the screen to compose your time lapse video. Take your time. A time-lapse video will use up most of the GoPro’s battery, depending on the length.
Make sure everything that you want in the time-lapse is in the frame. Look for distractions that you could get rid of by adjusting the camera angle.
When you are ready to start recording, press the shutter button like you normally would to start a video. Now the time-lapse is recording and will keep recording until you press the shutter button again.
As the video records, the front screen will display a timer. This is the total length of the time-lapse. Don’t confuse it with the amount of time that you’ve actually been recording for.
5. Finish Recording by Pressing the Shutter Button
Once you’ve finished recording, check the timer on the front of the camera to see if your time-lapse is long enough. If you are done recording, push the shutter button on the front of the camera to end the time-lapse.
With a time-lapse video, you’re finished. The GoPro has already stitched the photos together for you, so you don’t have to do anything else.

How to Shoot a GoPro Time-Lapse Photo
GoPro actually has two different ways to capture a time lapse—the video mode, or photo mode. The time-lapse option in the video mode will stitch everything together for you. This results in a video and not individual photo files. If you turn on time-lapse from the photo mode, you’ll end up with a sequence of photos. You can stitch these together into a time-lapse video.
Time-lapse photos take longer because you have to stitch everything together yourself. But working with images offers more control. You can edit those images before assembling into a video and drop unwanted photos from the time-lapse.
Shooting a GoPro time-lapse photo is similar to the steps outlined above, but start by selecting burst mode. Choose the rest of the desired settings. Press the shutter to start and again when you are ready to finish recording.
Once finished, you’ll need to assemble the photos together into a video to get a true time-lapse. The GoPro Quik app allows you to stitch everything together easily, without buying video software, since Quik is a free download.
Common GoPro Time-Lapse questions
How Long Can You Shoot a Time Lapse on goPro?
GoPro can shoot a time-lapse until the battery dies. So the answer depends on the GoPro battery life of your particular model. Most GoPros can shoot for 2.5 hours. Some older models cannot shoot while the GoPro is charging, unfortunately.
Newer cameras, including the GoPro Hero8, can charge while plugged in via a USB adapter. You can also use GoPro’s Supercharger or Portable Power Pack accessories.
What Is GoPro Time-Lapse Mode?
The GoPro time-lapse mode takes photos at preset intervals to stitch into a video. The result is a video where it appears as if time has sped up. Time-lapses are popular shooting techniques that are not unique to GoPro. GoPro has a time-lapse mode built-in to make shooting the popular format easy.
What Is the Best Interval for Time-Lapse?
That depends on what you want to capture and how long you want the video to last. If you are shooting fast action or the camera is moving during recording, choose a short interval, such as half of a second or one second. If you are shooting slower movement, such as a sunset, you can choose a longer interval.
Note that longer intervals can make the video appear choppy.
What’s the Difference Between Time-Lapse Video and Time-Lapse Photo?
On a GoPro, both time-lapse video and time-lapse photo takes photos at preset intervals. In time-lapse photo, those photos are untouched, resulting in still photo files on the memory card. In time-lapse video, the GoPro stitches the images together into a video, resulting in a video file.
Both can result in a time-lapse, but in photo mode, you need to do the stitching yourself. This is more work but also gives you more control over the final result.

Conclusion
GoPro’s built-in time lapse mode allows you to record your adventures in a brief video. Most users will want to use the time-lapse video mode, which creates the video for you. For more control, use the time-lapse photo mode and edit the photos into a time-lapse yourself.
Check out our Total Time-Lapse course to create the most amazing time-lapse videos!

