Sky replacement in Photoshop can be a lifesaver when the weather isn’t quite right. We can study weather apps, track the sun, and show up early to get the best light. But that doesn’t guarantee the weather’s always going to be perfect.
As a result, sometimes the sky in your frame is blank and boring. There are either too many clouds or not enough. Your composition deserves a better sky.
This article will show you how to use sky replacement in Photoshop. In a few clicks, you can turn a mundane sky into one that enhances your composition.
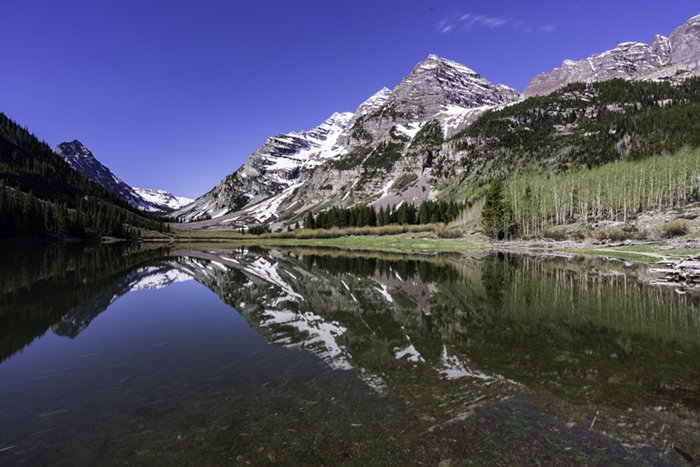
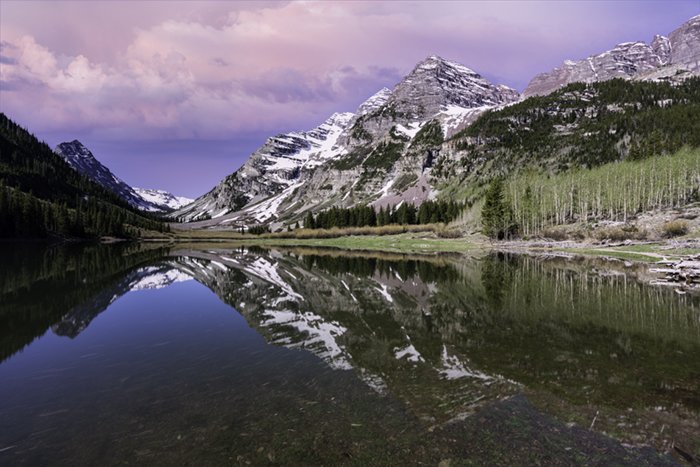
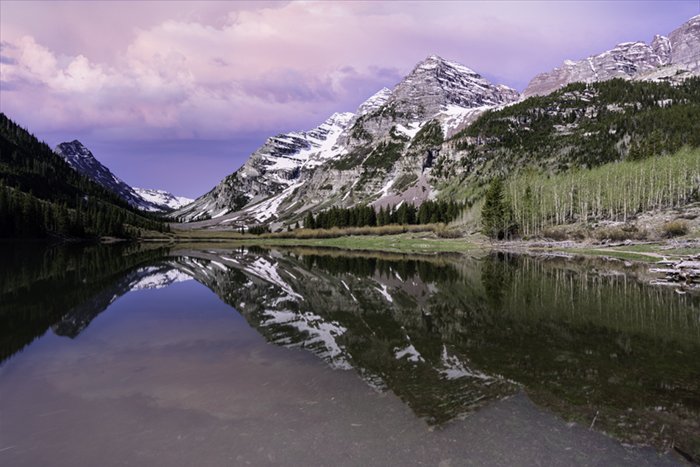
I tried to capture this composition over many days, but the sunrise was cloudless each day. The light on the peaks is nice, but the sky is simply blank. I can use a sunset captured on another day to enhance the composition.
When to Use Sky Replacement in Photoshop
First, let’s talk about when you should and maybe shouldn’t replace the sky.
If you’re creating artistic photographs, there is no reason you cannot replace the sky. If a new sky looks better to you, change it. But some genres of photography (photojournalism and travel) value the authentic experience. This means showing a blank blue sky or a wash of clouds.
Whatever you decide to do, be upfront about it. Do not try to hide a sky replacement. We understand that photographers edit images, and many make composites. Photographers make changes to create more artistic work. It is only a problem if you try to hide your edits.
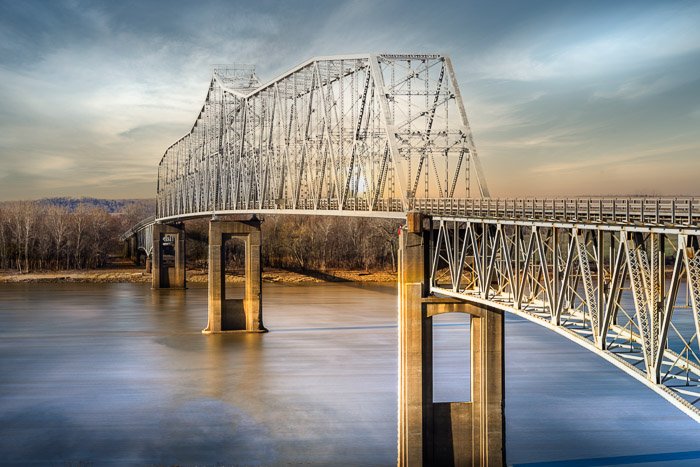
Also, decide if you want to use stock images for your sky. There are many stock skies available online that you can use. Photoshop comes with a few, too. But remember, other photographers took these stock images. So, at least part of your photograph was taken by someone else.
Some photographers only use their own sky images. This way, the entire image is theirs, even if they took the sky photograph at a different time. Start a collection of sky images to use as sky replacements.
How to Change a Sky in Photoshop
We’ve always been able to replace the sky in Photoshop. The first step was to create a mask of the existing sky and then add a layer containing a new sky. But masking the sky could be tedious. It wasn’t easy to get around tree branches and other fine details.
In the 2021 update, Adobe added a Sky Replacement tool. This automated the masking and light blending that could take hours to do. Let’s go through the process step by step. We will start by using one of Photoshop’s default skies. Then we will show you how to use your own.
Step 1. Open the Foreground Image in Photoshop
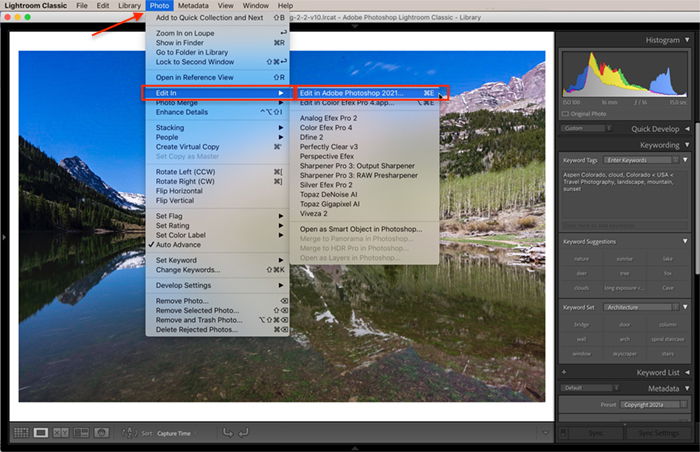
Open your main composition in Photoshop. If you use Lightroom, go to the Photo drop-down menu and select Photo > Edit In > Edit in Adobe Photoshop (Ctrl or ⌘E). Otherwise, right-click on the image and select Open With > Adobe Photoshop.
Step 2. Open the Sky Replacement Workspace
Go to the Edit drop-down menu and click Edit > Sky Replacement. The sky replacement panel appears.
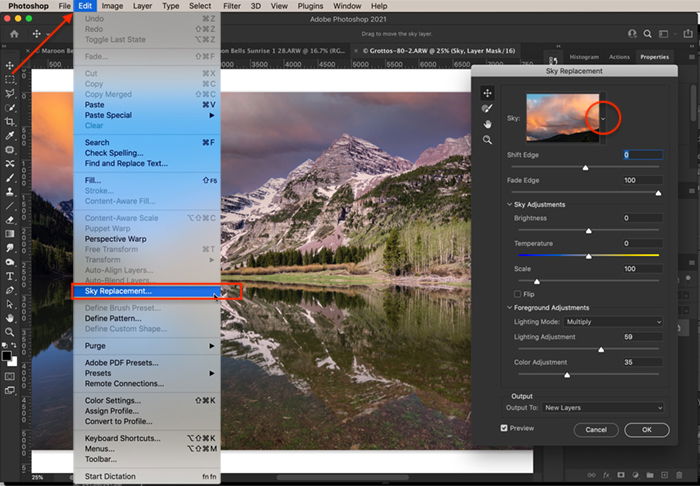
If you do not see the Sky Replacement tool under the Edit menu, update your Photoshop to the newest version. If the Sky Replacement option is greyed out, select the background layer in the Layers panel and try again.
Step 3. Select a Sky
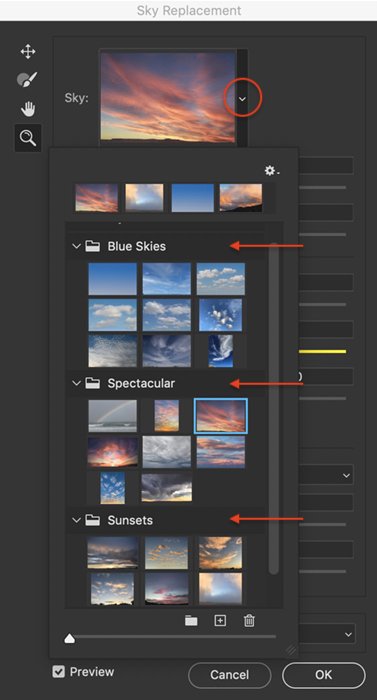
A new sky is applied to your image. To see other sky options, click the carrot next to the sky thumbnail. Photoshop includes about two dozen skies in the folders Blue Skies, Spectacular, and Sunsets. As you click through each sky, the preview automatically updates.
You do not always have to use the most spectacular sky. Sometimes soft clouds or a blue sky are better for your image. Also, pay attention to the direction of the shadows and light. Sun placement in the new sky should roughly match the direction of light in your original image. You can flip the sky by checking the Flip box.
Step 4. Adjust the Sky
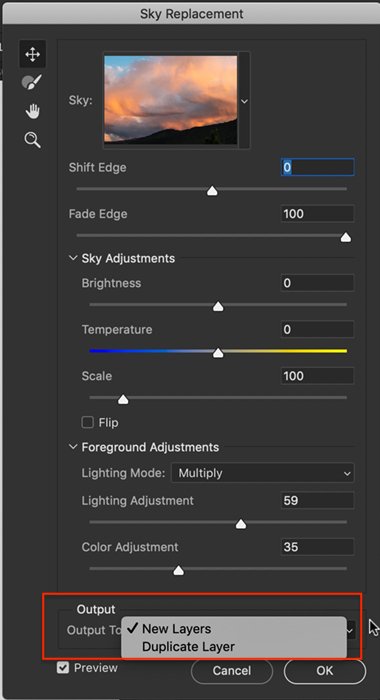
The new Sky Replacement tool does a good job of masking the foreground. But you can fine-tune how the new sky blends into the foreground using the Shift Edge and Fade Edge sliders. The Shift Edge slider changes the border between the foreground and the new sky background. The Fade Edge slider increases or decreases the feathering between the two.
You also have a few tools to the left of the sky thumbnail that let you manually adjust the sky. At the top is the Sky Move tool. You can grab and drag the sky around in the background. This is useful when you have a sky image with minor elements to hide behind your foreground.
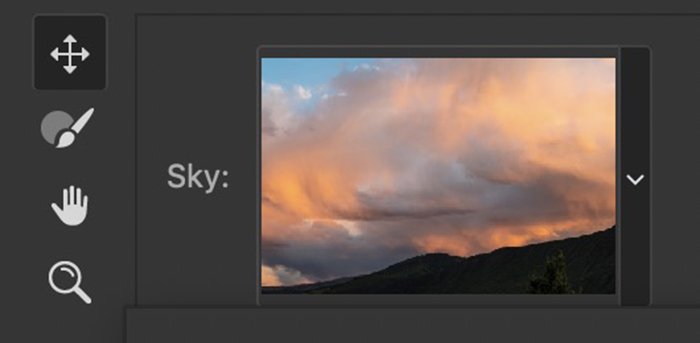
You can also use the Sky Brush tool to erase or paint the sky onto the foreground manually. This tool alters the mask. The Hand tool and Zoom tool let you zoom in and move the image around for detailed editing.
You can also use the Scale slider to make the sky larger or smaller. Photoshop automatically scales the sky image, but you may want to change the position of the sky.
Step 5. Adjust the Lighting
Photoshop blends the light in your original image with that in the sky. Realistic sky replacements match the direction of the light and the color.
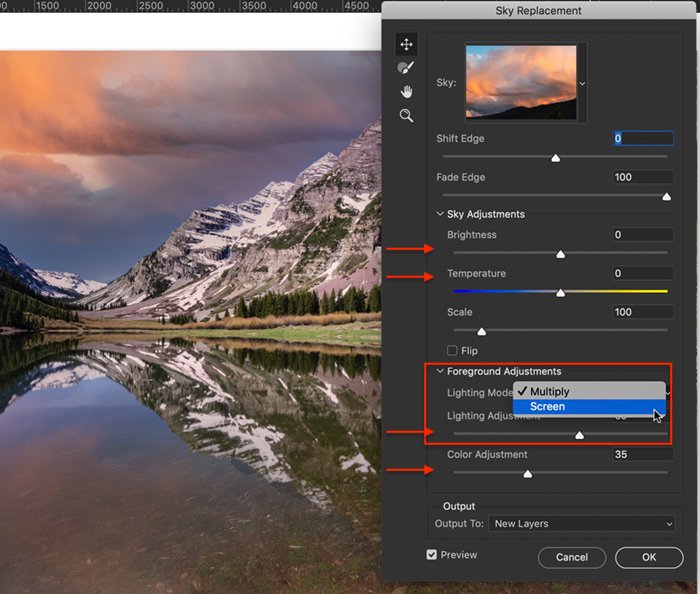
You can change the lighting using the other sliders in the Sky Replacement window. You can adjust the brightness and temperature of the sky. You can also tweak the lighting and color of your foreground to better match your chosen sky.
There are two options for the Lighting Mode—Multiply and Screen. These are familiar blend modes. Multiply darkens your image, and Screen lightens the image. Select the option that looks best.
Step 6. Apply Changes
Before you click OK, select how you want Photoshop to output the results. By default, the results are output as new layers.
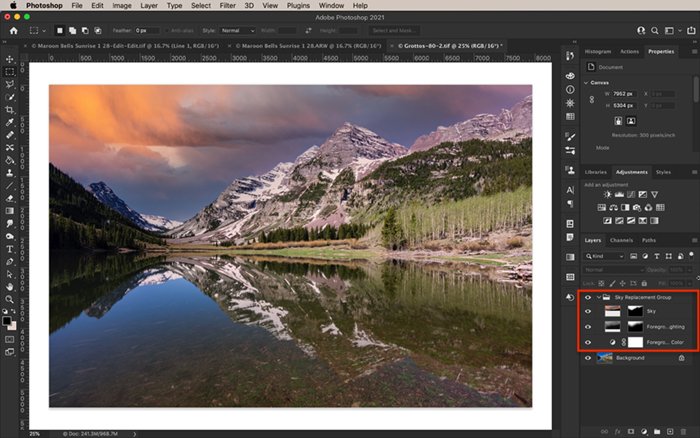
This option creates a new Sky Replacement Group in your Layers panel. Within this group is a Sky layer with a layer mask, a Foreground Lighting layer with a layer mask, and a Foreground Color adjustment layer. This option allows you to continue editing the sky replacement masks and lighting.
The other option is to output as a duplicate layer. This option combines changes into one layer. This limits your ability to edit the sky replacement.
Click OK.
Adding your Own Sky Images
There are a couple of added steps if you want to import your own sky. But once you add a sky, it is available for future use.
Step 1. Open the Original Photo in Photoshop
Either round-trip the photo from Lightroom into Photoshop or right-click on an image and open it directly in Photoshop.
Step 2. Select a Sky Image
Choose a file containing a replacement sky and save it as a JPEG or TIF file. Don’t worry if the file is not the same size as your foreground. Photoshop will scale the sky to fit the image.
Step 3. Open the Sky Replacement Workspace
Go to the Edit drop-down menu and click Edit > Sky Replacement.
Step 4. Import Your Sky
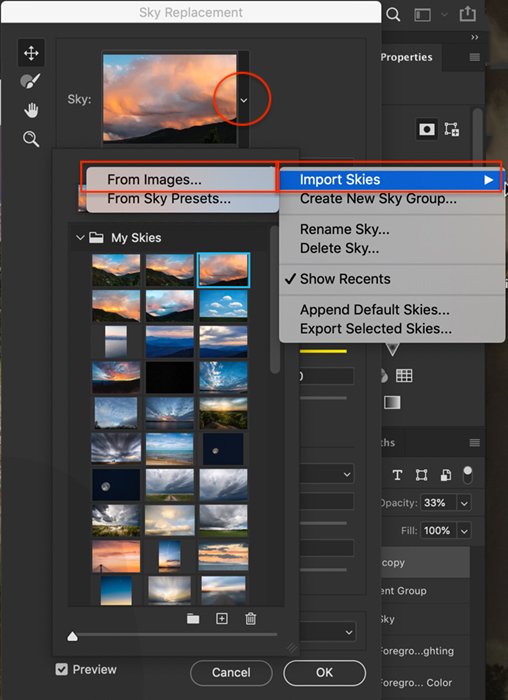
Click the carrot next to the sky thumbnail. Then click the gear symbol. Select Import Skies > From Images. You also have the option to Create New Sky Group. If you intend to import many skies, create a new group to help you organize your files.
Navigate to your saved sky file. Click Open. The new sky thumbnail is added and available as a sky replacement.
Step 5. Adjust the Sky and Lighting
Use the sliders in the Sky Replacement window to adjust how the sky blends with your foreground.
I took the sky image about eight hours later but within 10 miles of the original photo’s location. Photoshop’s Sky Replacement tool allowed me to make a composite image of the two photos.
Mirroring Sky Replacement
One limitation of the Sky Replacement tool is that it does not recognize sky reflections. It does a good job of masking the sky. But the tool ignores the sky’s reflection. To reflect a sky replacement, duplicate the layers that Photoshop creates and manually flip them.
You will need to unlink the layers and drag the mask to a new blank layer. Then vertically flip both the sky and the layer mask. Reposition the mask and the sky. Reflections look more realistic if they are slightly compressed and darker than the original.
You may have to do some blending to make the reflection look realistic. You can also try adding a Gaussian blur.
Conclusion—Sky Replacement in Photoshop
Sky replacement in Photoshop makes it easy to replace a sky in your photos. The program masks the sky and suggests blending and lighting options to make your new sky look as natural as possible. But if you do not like Photoshop’s results, you have a lot of flexibility. For example, you can import sky files, and you can change the color and lighting of both the sky and the foreground.
Photoshop is the only Adobe program that has the Sky Replacement tool. You will need to round-trip files from Lightroom into Photoshop if you want to change the sky. Photoshop Elements has a background replacement option. But this does not work as seamlessly as Photoshop’s Sky Replacement tool.
Next time you are out taking photographs, and the sky is spectacular, take the shot. You may not have a good composition in front of you. But you can use this sky later when you find a good composition with a lackluster sky.
