Blurry photos can be a real annoyance, but with the help of Lightroom, they can be easily fixed. Here are three easy steps to sharpen and fix blurry photos in Lightroom.
Fix Blurry Photos Without Lightroom’s Automatic Sharpening Setting
Automatic sharpening irritates many photographers. When you import your photos into Lightroom, it automatically sharpens them. The effect isn’t intense. However, it can be annoying if you want to start with a clean base.
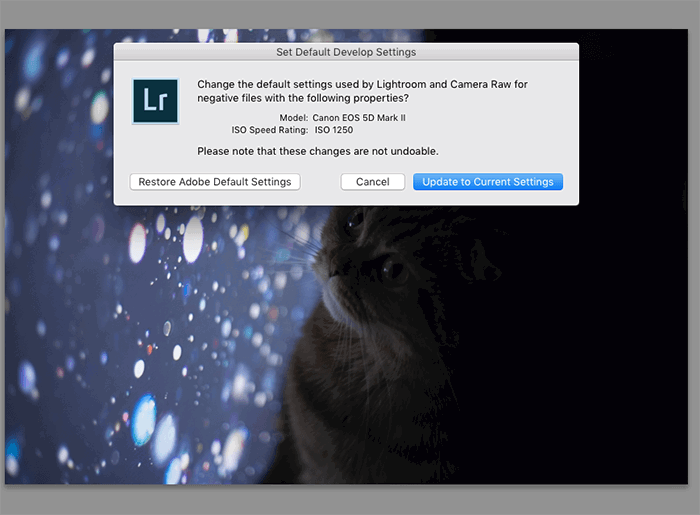
To change this setting, go to Develop > Set Default Settings.
You can choose to reset Lightroom’s default settings. You also have the option to turn your current develop settings into the default settings. You have to adjust your settings in the Develop module and then return to the Default Settings window.
Shoot in Raw Mode to Preserve Precious Image Data
You should be familiar with JPG and RAW before you even get to the sharpening process. Choosing one over the other will have a significant impact on the quality of your images.
Most cameras can shoot in both RAW and JPG. To make things easier during the editing process, shoot in RAW mode. Your image files will be larger, but they’ll have a lot of image data.
This means that you’ll be able to experiment with different sharpening intensities and not worry about image quality.
If your camera offers JPG mode only, don’t worry too much about this tip. You’ll have to be more careful with Lightroom’s sharpening tools, but you’ll still be able to enhance your pictures.
Understand Sliders in the Detail Panel to Improve Your Sharpening
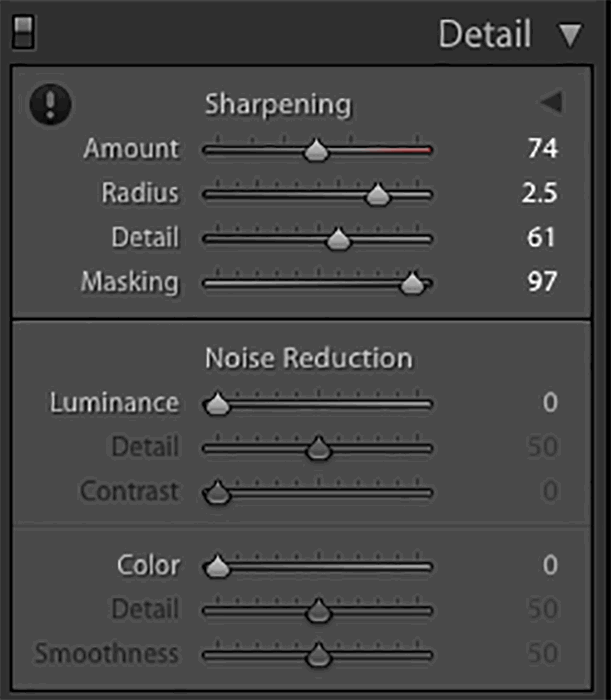
Amount
As the name suggests, this is the amount of sharpening you want to create. Too much sharpening can ruin your image. To avoid this, you can zoom into your picture to see how the pixels are affected by the slider.
Another method you can use is to slide up to 100. Then, work with the other sliders until you’re satisfied with your results. You can then move the Amount slider to the left. You can think of this as lowering the opacity of the sharpening layer.
You can also hold the Alt/Option key as you use the slider. This action will temporarily make your photo look b&w and make it easier for you to see any changes.
Radius
Radius makes sharpening stand out more. It’s a subtler version of clarity.
If you drag the radius slider to the right and zoom out of your picture, you’ll notice a huge difference. The edges of your subject will look thicker.
Again, you can hold the Alt/Option key to see the areas that will be affected by the slider. You can use this shortcut for every slider in the Detail panel.
Detail
As you drag the Detail slider to the right, your entire image will stand out more. This will also create a lot of noise, especially in empty areas, which can ruin even the simplest of photographs.
Fortunately, you can make up for this by using the Masking slider.
Masking
This is one of the handiest tools in the Detail panel. Masking automatically detects and masks blurred areas in your image. This removes any sharpening in those areas.
What remains is an image that’s sharp in all the right places. This is a more natural approach to sharpening and can make your pictures look much more appealing.
To see which areas will be masked, hold the Alt/Option key as you move the slider. Anything in black won’t be masked. The white parts will all remain sharp.
This can get tricky if your image doesn’t have any specific sharp parts. If you used a large aperture (e.g. f/1.2), Lightroom might not be able to detect any sharpness at all. In this case, you can go to the next step to have more control over the sharpness of your photo.
Use the Brush Tool to Make Specific Parts of Your Photo Stand Out
Locating and Using the Brush Tool
Lightroom is known for its sliders, but did you know it has a lot of other helpful tools?
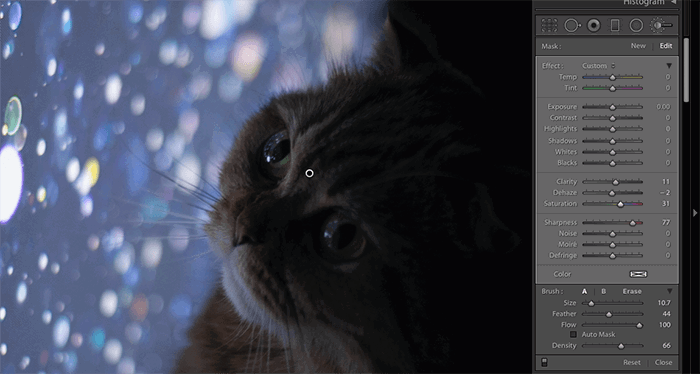
Go to the Develop module. Right under the Histogram screen, you’ll see a row of six icons:
The last tool is the hero of selective sharpening. You can use the adjustment brush to sharpen, brighten, and color correct details.
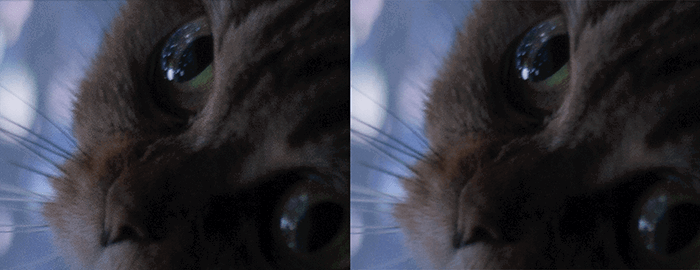
All you need to do is click on the Adjustment brush. A new set of sliders should pop up. Brush over the area you’d like to sharpen. Then, move the Sharpness or Clarity slider to the right. You’ll instantly see a change.
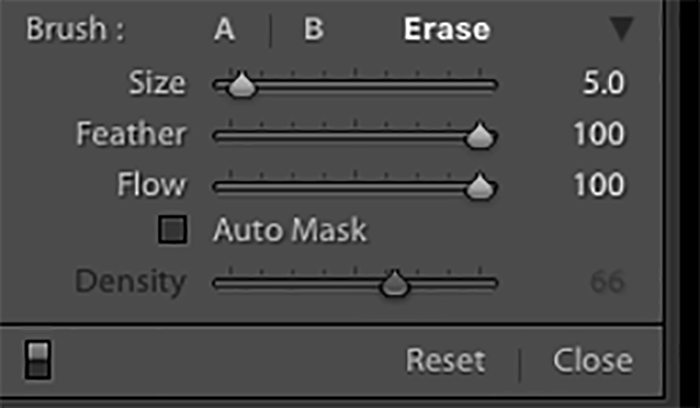
Other Helpful Brush Tools
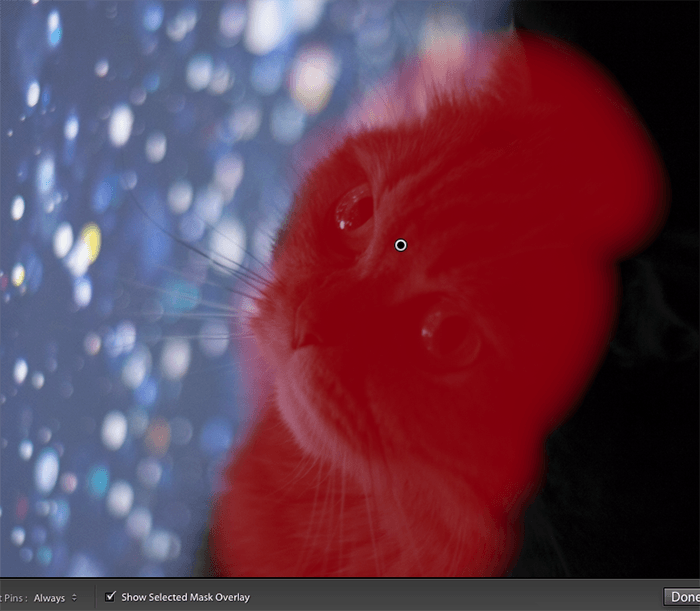
You can click on Show Selected Mask Overlay to see where you used your brush. Lightroom will highlight every brush stroke in red.
When everything is ready, click on Done. If you want to make adjustments in the same area, click on the Brush tool again. Click on the circle where you made your changes. The new sliders should pop up again, and you can continue where you left off.
Conclusion
Lightroom offers many sharpening tools. You can enhance your photo with a few sliders or brush strokes. These tools can make your editing process easier and much more fun.
Check out our Effortless Editing with Lightroom course to master editing in Lightroom!
Lightroom Sharpening FAQs
Does Lightroom Automatically Sharpen?
By default, Lightroom applies mild sharpening to every imported photo. You can fix this by changing Lightroom’s default settings.
How Can I Sharpen Blurry Photos?
You can’t make a blurry photo more visible, but you can enhance it with a couple of Lightroom tools. You can use clarity to make the image pop. You can then emphasize details using the sharpening tool.
What Does the Masking Slider Do in Lightroom?
The masking slider lets you sharpen the most critical parts of an image. It doesn’t sharpen blurred areas. Because of this, it helps avoid extreme sharpness that can ruin the quality of your pictures. You can think of it as an automatic selective sharpening tool. Hold Alt/Option while dragging the Masking slider to see where sharpening is applied.
What Does Clarity Do in Lightroom?
Clarity brings out the details in an image. It creates an HDR-like effect, emphasises textures, and sharpens details. Too much clarity can make your photos look rough and unnatural, so use it wisely.

