Setting up a good Lightroom workflow will not only save you time. It will also ensure your images are consistent.
Editing your images is just half the battle. You will need to import, select and export your photos. Metadata and keywording are other important counterparts to be able to use Lightroom to its full capacity.
This article will look at how to master a photo-editing workflow in Lightroom with some tips and tricks along the way. But first, let’s get familiar with the concept.
What Is a Lightroom Workflow for Photo-Editing?
A workflow is a sequence of tasks you need to complete to reach your goal. In photography, this sequence starts with setting up your camera before shooting and publishing your images. What happens in between is what will determine how efficient you are during your workflow.
Lightroom is one of the most popular photo editing programs. This is why we are going to go through sections of your Lightroom workflow step-by-step. By the end of the article, you will have a better idea of how to create your editing process.
Keep in mind that this article is about Lightroom Classic. In the new Creative Cloud Suite, Lightroom has an entirely new workspace and design.

1. Organize Your Photos After Importing
The first port of call is having a clear idea of how you will store your image files on your computer or hard drive. For me, I find it best to have folders set up according to date. This allows me to show progress from day to day, month to month, year to year.
Other photographers may find a better solution, depending on the photography they do. For events, the name of the event with the date could be the name of the folder. For landscape photographers, perhaps the location would work best.
You can also separate your work into folders depending on the field of photography, whether they are portrait, documentary, or creative projects.
Create a Catalog
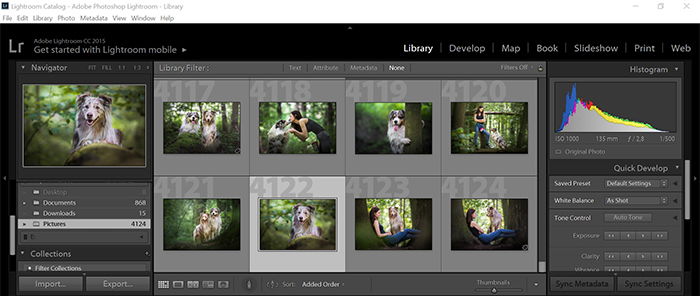
A Catalog is a great way to keep your images organised. By rule, you need at least one Catalog for Lightroom to work. All the information about your pictures is stored there, so you need to periodically back it up.
You could make more Catalog based on location, event, year, or even field of photography. This can lead to confusion but will allow Lightroom to work faster and more efficiently.
Organize Your Catalog
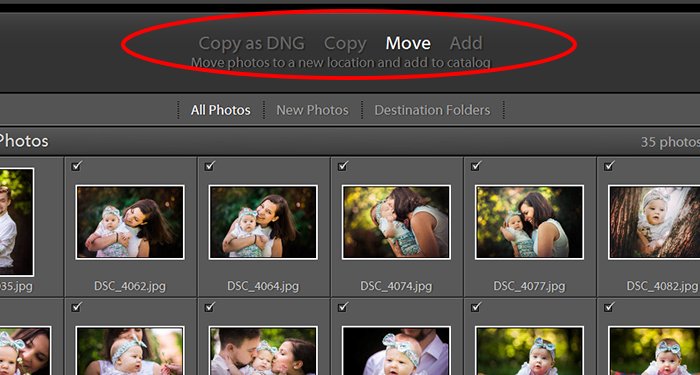
- Copy, Move or Add. When you first import images into Lightroom, you have three options. Copy will let you copy from your memory card in the format you shot them in. Move will move your image folder to a new location, and they will no longer exist at the previous location. Add will add the photos you select to the database in their original location.
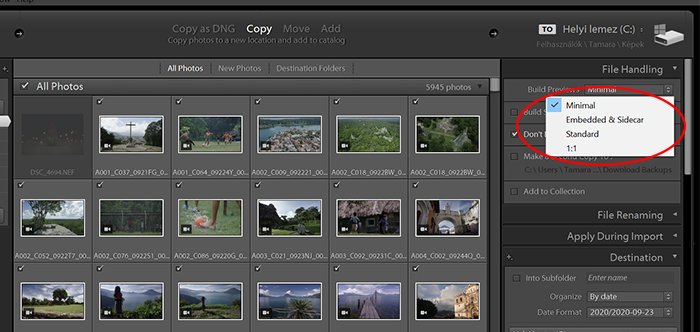
- File Handling. Here are the tools that can highly improve your efficiency and speed in organizing your photos. In the Build Preview pop-down menu, there are four options. Embedded and Sidecar modes are best if you often import. 1:1 mode allows for quick magnification in the previews, as it stores them in full resolution. They are slower to build and require more disk space, though.
- Apply During Import. This panel allows you to apply presets and keywords during the import phase of your workflow. If you have a favourite preset that you want to use instantly, this is a great way. In the metadata section, you can add embedded tags to the files. More on that later.
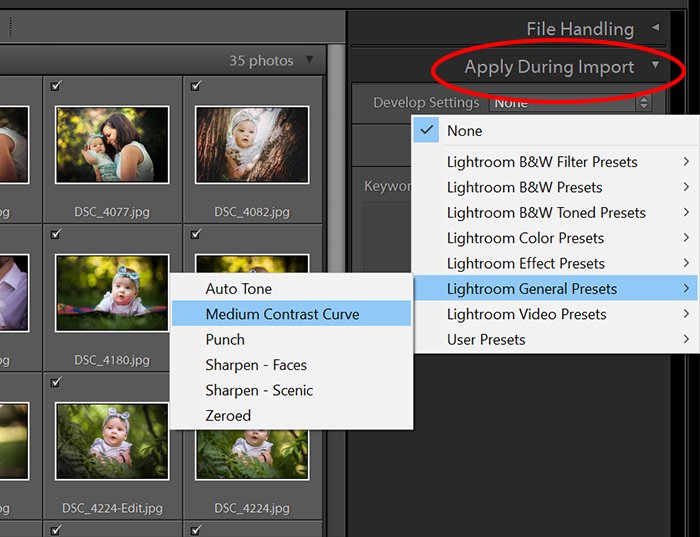
- Keywords. If you are importing photos from a particular event or shoot, use the keywords to tag them before importing. They are not stored in the files and will help with further organizing in the Library.
2. Add Metadata to Protect Your Images
Metadata is the information behind the image. If you want to add information to tell others who the photo belongs to, this is the area to do it.
For copyright assurances, add your name and email address to avoid mistaking who the image belongs to.
You can apply this during the import, as long as you create a preset by saving entered data. This area is also great for information on when exactly the photo was taken.

3. Use Auto-Advance to Go Through Your Images
Going through your images can take time. The best way to start is not by using the mouse or keyboard arrows. Those extra clicks add up and take a lot of time for your workflow.
Auto-Advance is your best way forward. It automatically goes to the next image after an action is complete.
You can find Auto-Advance under the top menu bar under Photo > Auto-Advance.
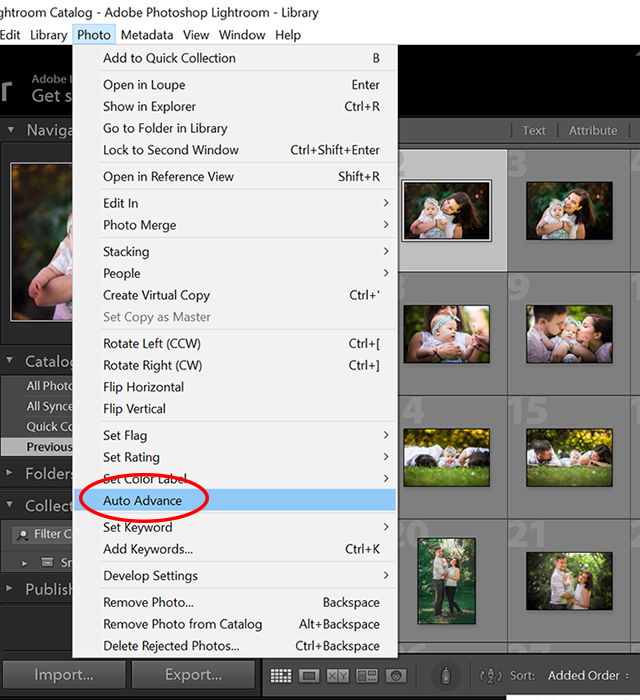
4. Use Selection Tools to Choose the Best Images
By going through your photos with selection tools, you will find that you can quickly select images for later use.
There are many ways to use selection tool combinations in selecting files you want to keep. Try not to delete any photos unless they are technically flawed, as you never know when you may need those images.
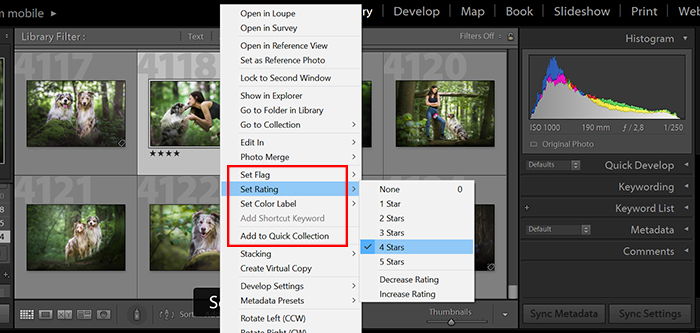
I suggest using flags or a quick selection to pull aside pictures you do not want to keep. After this, go through the session again using colors. You can either separate the types of photography or distinguish between images that require heavy, light, or no editing.
Then go through them again to rate each photo with the star rating system.
Stars
Stars are an excellent way to rate your images in Lightroom. The very best pictures could receive a 5-star rating, and then the stars descend with the following appropriate images. You add stars by using the numbers on your keyboard, where a 0 will bring it back to zero.
Colors
Colors allow you to differentiate between images, creating a flagged collection of sorts. There are five colors in total, and you add colors to your photos using numbers 6-9. The last label, purple, does not have a shortcut.
Flagging
Another great way to select images for later uses is flagging. You press P for picking or X for rejecting.
Quick Selection
Each image offers you a quick selection to make particular photos searchable. You can find Quick Selection in the Catalog tab on the lefthand side of the Library Module.
5. Organize Your Files
- Create Folders. Creating a folder in Lightroom is a handy way to separate photos inside the program. Adding a folder here adds it on your computer automatically. In the Library Module, click on the + symbol in the corner. To add a folder to an already existing one, right-click on the left-hand area and click on Create Folder Inside.
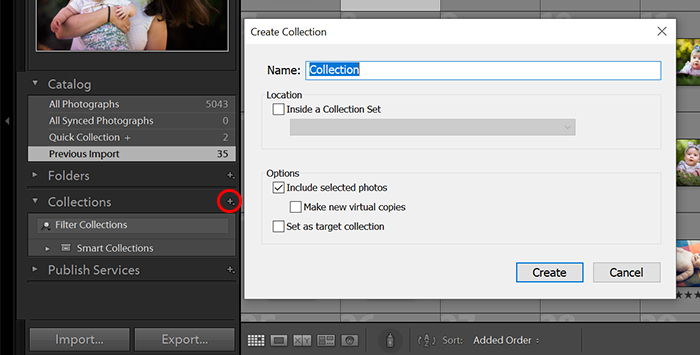
- Assign Photos to Collections. Collections are my favourite tool in Lightroom. They are perfect for organizing all types of images, even ones that would not necessarily go together. If I wanted to collate all of my best live music photos from the past year, a few actions would sort all these into a folder for me.
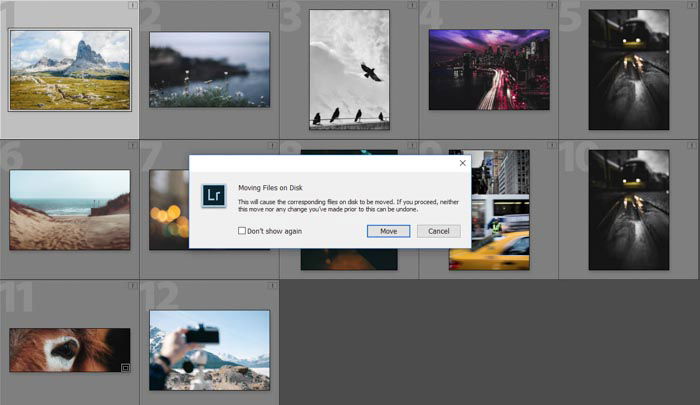
- Move Images. Moving images is a grey area in Lightroom. Some people prefer to do it inside the program, but others consider this heresy. You drag the folder from its location in the right-hand area to another folder. You will be prompted that what you are doing cannot be undone. Of course, you can move it back. This process will move the folder on your computer desktop too.
- Use Smart Collections. This idea of folder creation has no limits. You could create parameters to find and add all your images that you wanted to convert to B&W over the past decade but never had time. This would look across dates, color flags, ratings, and much more.
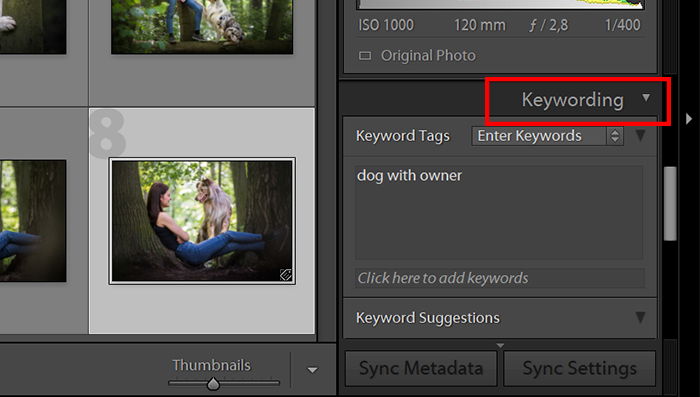
6. Keyword to Master Your Lightroom Workflow
Keywords are essential. They are the sort of tool you want to use as soon as possible. The change they make is shocking, which you can test yourself on a mass database.
I always add the band name, the month and year I shot them, the venue, the city, and even the camera for live music.
This way, after photographing hundreds of bands, I can find all images taken with a particular lens. Why might this be important? When Lightroom adds my lens to their distortion fixing profile, I can change them all with one click.
7. Which Tools in the Develop Module Can Help Your Workflow
Apart from the well-known sliders, there are several other tools to help you with your Lightroom workflow.
- Presets. These are pre-created settings from other photographers or yourself. Presets add a filter-look to your pictures. This saves time during your Lightroom workflow. Instead of changing multiple settings individually, you can apply them to photos in the develop module with one click. You can download and add these to Lightroom in a specific manner.
- Plugins. Plugins are a great way to make your workflow more effective. You need to download and install these, and there are many to choose from. One that I like is called Focus Mask. This shows the parts of the image with the most detail and, thus, the areas where the focus lies.
- Moving Back and Forth Between Photoshop. This action can be a game-changer in your photo editing workflow. Right-click on the image you want to move and go to Edit In… Find Photoshop (you need to have the program already installed), and it will open the image for you. Whatever editing you do, click on Save rather than Save As. Lightroom will not pick up the edited version otherwise.
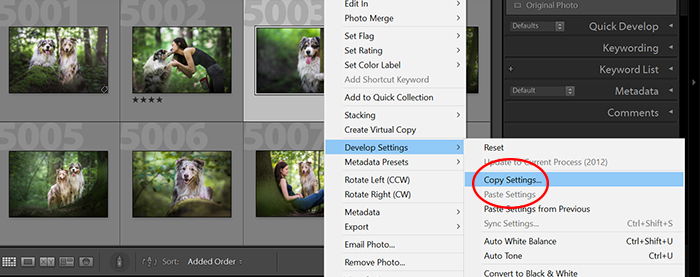
- Copying and Pasting Settings. If a session of mine contains many photos of the same orientation, light settings, and white balance, I can copy all completed settings. This allows me then to select one or multiple images and then paste the settings across. It will enable me to work on one image but get many back without extra work.
8. Finally, Exporting Your Images
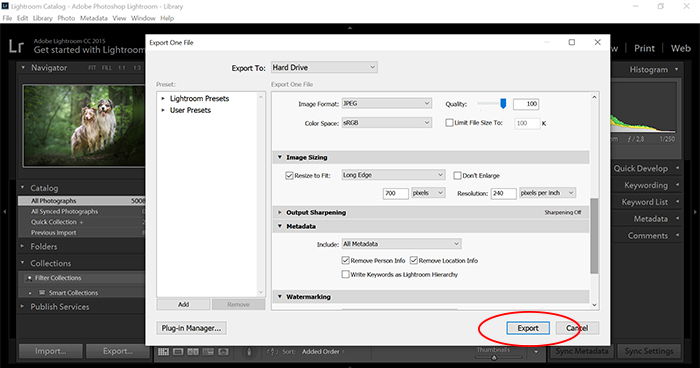
Once you are done editing in the Develop module, you can move on to the final step and export your work.
- Export Location. Choose the location on your computer where you want to save the final photos.
- File Naming. This section lets you either keep the original file name. You can also batch name the exported files with increasing numbers, dates, or anything you specify.
- File Settings. Sets the file format and the quality (compression) of the exports.
- Image Sizing. If you want your images to have the same dimensions, you can set them here. There are many options to choose from, including size in megapixels, length of the longer edge, and more.
- Output Sharpening. Lets you add extra sharpening, should you need it. If you are exporting for the web and choose a lower quality, set low or standard. If you are exporting for archival purposes or printing, disable this setting.
- Metadata. This section lets you specify what metadata you want to keep in the files you export. For the web, it’s ideal only to include your copyright info. That way, your settings and camera type will not show up in the published files.
Conclusion
Knowing how your Lightroom library works saves you from confusion and missing files.
A good Lightroom workflow is highly personal for everyone. If you are a post-processing beginner, it might take some time to develop your Lightroom workflow. Take time to explore the different options of Lightroom to save time during editing!
Try out our Effortless Editing course to master all the secrets of professional editing in Lightroom.
