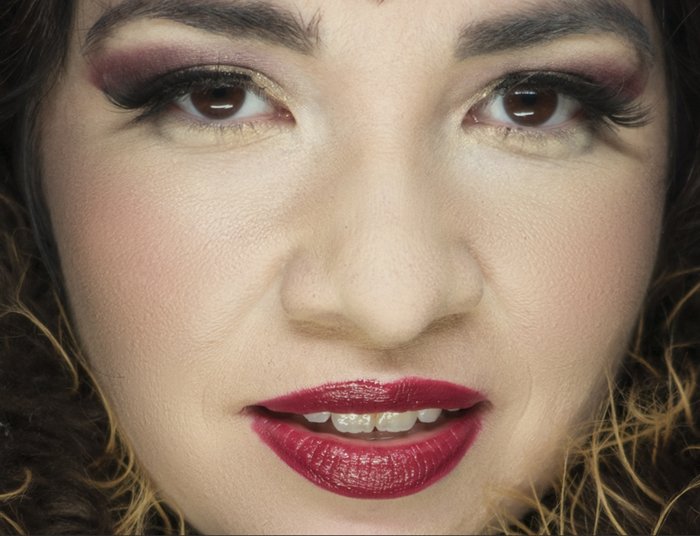
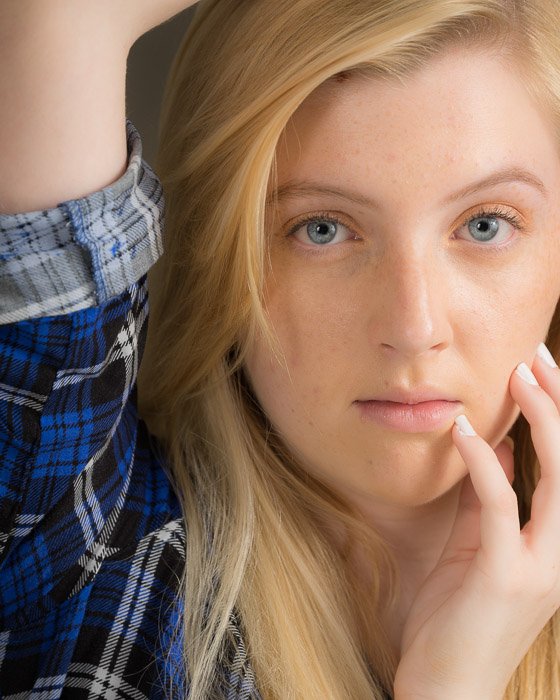
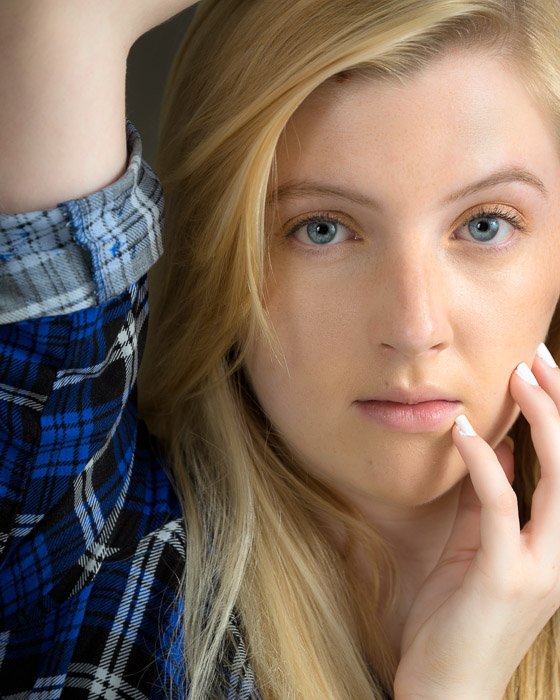
Learning how to master frequency separation in Photoshop can be a great way to improve your portrait retouching. This technique allows you to separate the texture and color in an image, providing a greater level of control over fine details and broader tonal ranges. When you understand frequency separation, you’ll discover new possibilities that elevate your portrait editing.
Frequency Separation In Photoshop: What Is It?
Frequency separation is a tried-and-true Photoshop process used by portrait photographers. The process puts high and low-frequency information onto different layers.
High-frequency information is about the fine details. These include hair, texture, pores, fine lines, and skin imperfections.
Low frequencies carry information about shadows, tone and colors.
Separating low and high-frequency information onto different layers means that you can retouch one without affecting the other. You can smooth the skin’s texture without affecting the color. Or you can lighten shadows without changing skin texture.
This allows for more precise skin retouching.
How to Create Frequency Separation in Photoshop
Before you begin retouching a photo, follow this frequency separation process. We will create a low-frequency layer that we’ll call “Shadows & Color”. Then, we’ll create a high-frequency layer that we’ll call “Skin Texture” or “Texture”.
Step 1 – Create Layers
Open your image in Adobe Photoshop and create two duplicate layers. You can do this by right-clicking on the background layer and selecting Duplicate Layer (Ctrl or ⌘J).
The top layer will become a high-frequency layer. The other is for low-frequency information. The Background layer allows you to revert back to the original necessary.
Label the layers so you can keep track of them. I call the high-frequency layer “Skin Texture” or “Texture”. I call the low-frequency layer “Shadows & Color”.
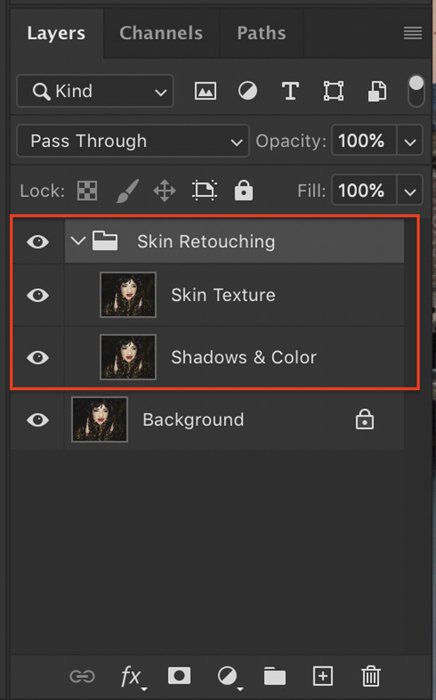
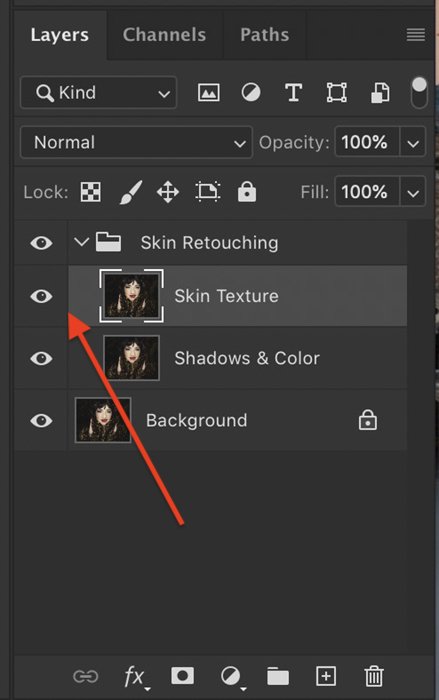
I usually group these two layers together into a folder. Do this by holding the shift key as you select. Then right-click and select Group from Layers (Ctrl or ⌘G). I label the group “Skin Retouching”. After I finish my retouching, I can toggle both layers on and off at the same time.
Expand the group so you can see both layers.
Step 2 – Prepare the Low-Frequency Layer
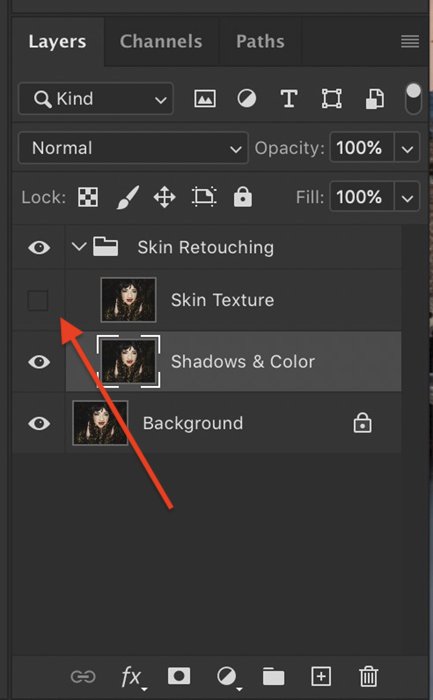
First, turn off the top layer by clicking the eye icon next to the layer. This allows you to see the changes you are about to make in the low-frequency layer.
Select the layer labelled “Shadows & Color”.
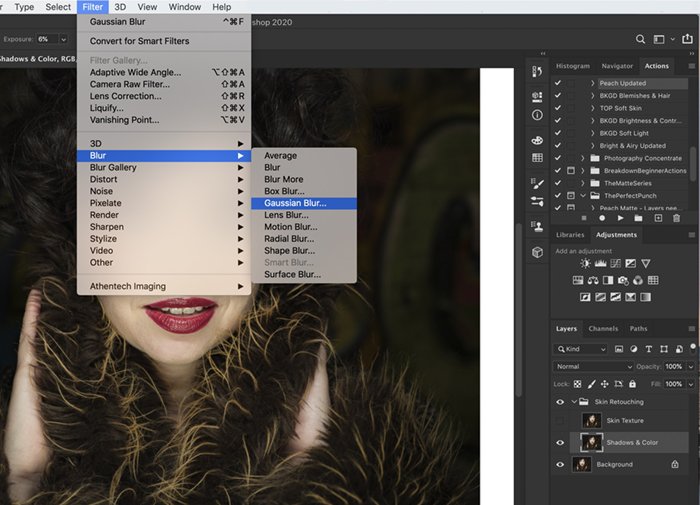
We’re going to add a blur to this layer to smooth the skin. Go to Filter>Blur>Gaussian Blur.
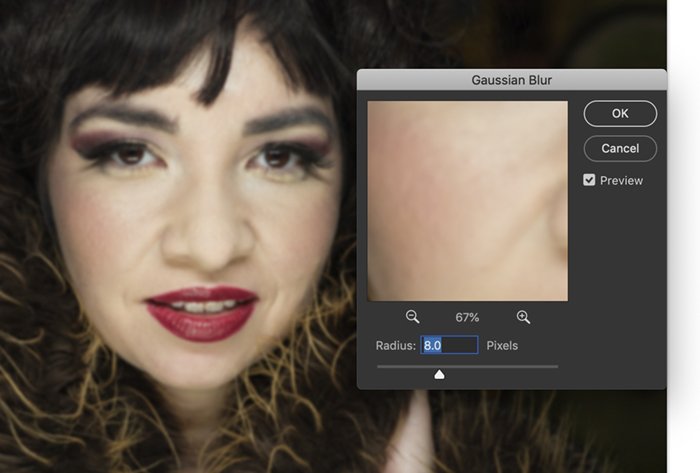
In the pop-up dialog box, select a radius value that blurs the texture of the skin. You don’t need to add too much blur. Somewhere between 5 and 10px is probably enough.
You can use Surface blur instead of Gaussian blur. Try both and see which you like best.
We’re going to blend this blur in a minute to add back some skin texture.
Click OK.
Step 3 – Prepare the High-Frequency Layer
Turn on the high-frequency layer labelled “Skin Texture” by clicking the eye icon and select the layer. Make sure you have the layer selected before moving on.
Preparing the high-frequency layer uses a tool you may never have used before in Photoshop. The Apply Image tool. This is a blending tool that combines information from two images. In this case, we’re combining the high and low-frequency layers.
Go to Image>Apply Image to open the dialog box. The settings will revert to previous settings. If you’ve never used this tool before, your dialog box probably looks like this.
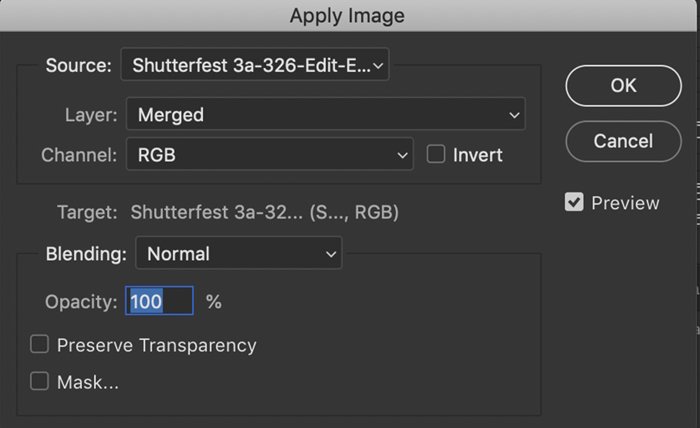
Enter the following settings:
- Layer: Shadows & Color
- Blending: Subtract
- Scale: 2
- Offset: 128
Your image will go grey, and you will be able to see the outlined edges of facial features.
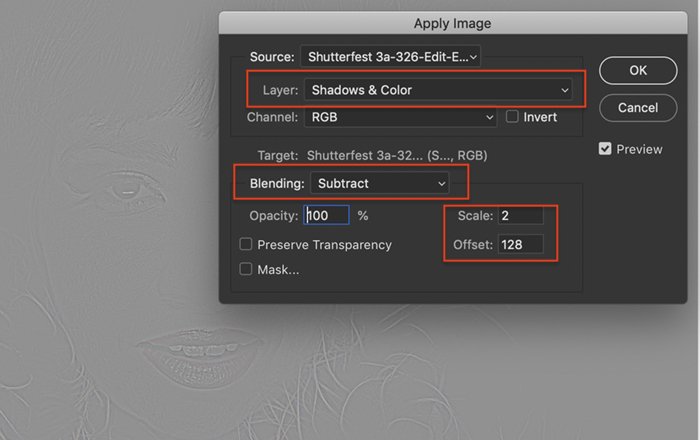
By selecting the Shadows & Color layer, you told Photoshop to blend the high and low-frequency layers together. Then you told Photoshop to blend the layers by subtracting one from the other.
Entering 2 in the scale box told Photoshop to halve the effect. It’s too strong otherwise.
Finally, by entering 128 in the offset box, you brightened the image. The offset scale is from 0 to 255. 128 is about halfway.
Click OK.
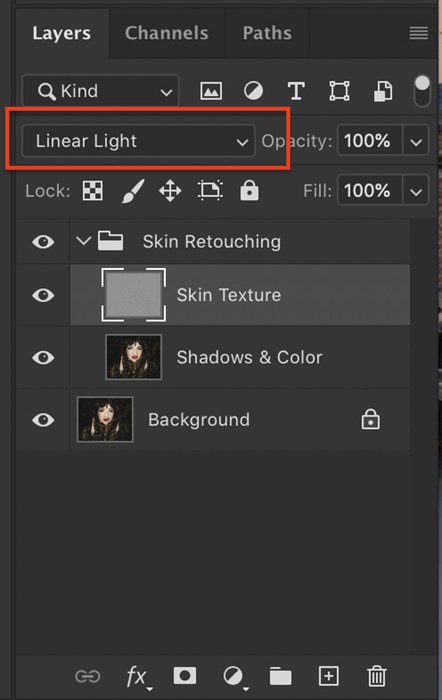
One last step will get your photo looking back to normal. Choose Linear Light blend mode from the dropdown menu at the top of the layers box.
How to Use Frequency Separation
Congratulations! You’ve completed the frequency separation process. The high and low frequencies in your image are on separate layers.
Don’t worry if your image doesn’t look any different. Frequency separation lays the foundation for your skin retouching.
If you want to see more of the blur layer, lower the opacity on the Texture layer. Compare 100% opacity with 80%. This will blur the overall image, including features like hair, so don’t overdo it.
Frequency separation allows you to work independently on the two layers you created. When you want to change details in the skin’s texture like wrinkles, or pores, retouch on the “Texture” layer. When you want to remove redness or lighten shadows, retouch on the “Shadows & Color” layer.
I tend to make most changes on the Shadows & Color layer.
Let’s now apply some common retouching adjustments to the separate layers.
Adding Smoothness
Rough or porous skin will smooth out by adding blur to the area.
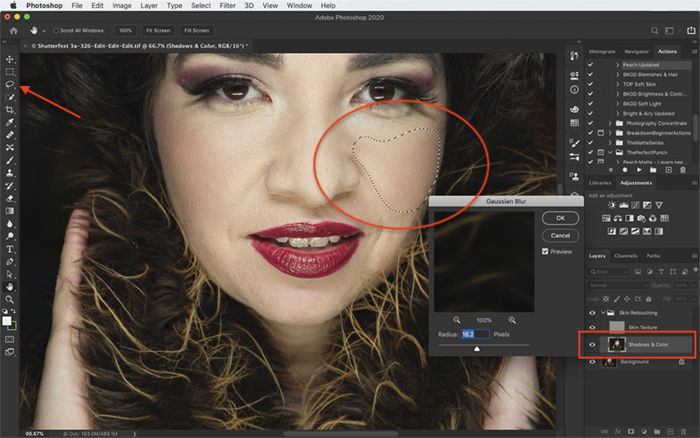
On the Shadows & Color layer, use the lasso tool to circle the area you want to smooth.
Feather the edges of the circle by changing the number in the Feather box in the Lasso toolbar. Somewhere between 30 and 50px should be enough.
You’ll be better able to see the feathering effects by clicking “Q”. This opens the Quick Mask Tool. Click the Q key again to turn the mask off.
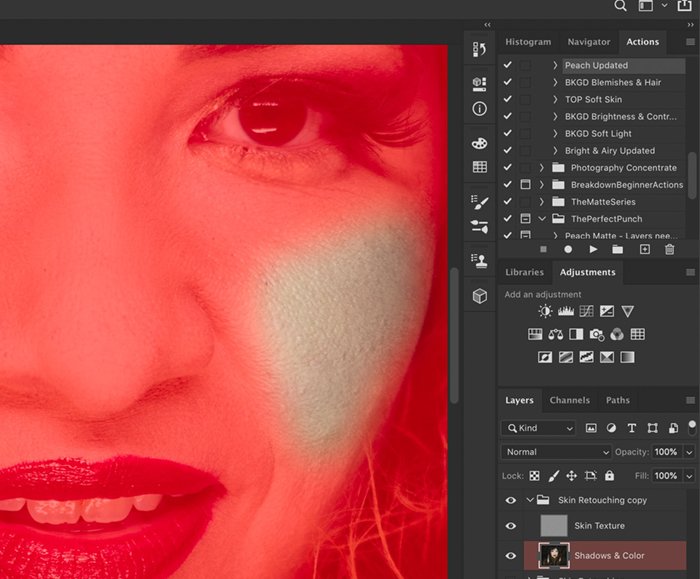
Go to Filter>Blur>Gaussian Blur. Select how much blur you want by changing the radius. Somewhere between 10 and 20px is probably good, but go higher if you need to. Because you’re working on the Shadows & Color layer, the area won’t completely blur. The texture from the high-frequency layer will still show through.
Repeat this process to add smoothness to selected areas of the face. You can remove many imperfections with this process.
Reducing Wrinkles
Retouching wrinkles uses a similar procedure. Removing wrinkles entirely often results in a fake look. Our eyes know that something is missing.
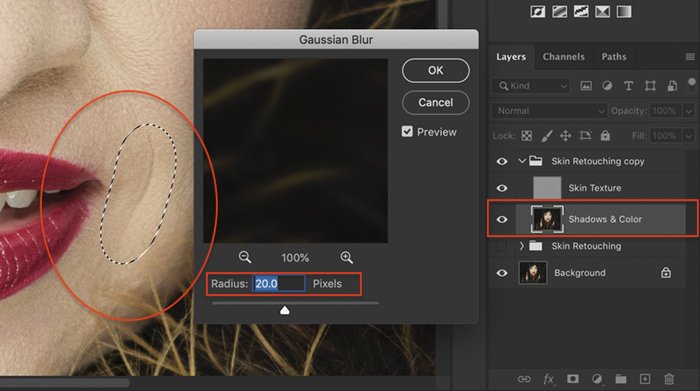
On the Shadows & Color layer, use the lasso tool to circle the wrinkled area.
Go to Filter>Blur>Gaussian Blur.
Select how much blur you want by changing the radius. Somewhere between 10 and 20px is probably good, but go higher if you need to. Because you’re working on the Shadows & Color layer, the area won’t completely blur. The texture from the high-frequency layer will still show through.
If the wrinkles are deep, I also lighten the shadows in the area.
Select the Dodge tool. I think this tool looks like a lollypop. In the toolbar that appears, select a soft brush. Choose Shadows from the Range box and set your exposure to around 10%.
![]()
On the Texture layer, paint over the wrinkle.
You can also use the Blur tool. The icon looks like a water drop. In the toolbar that appears, select a soft brush. Choose Lighten from the Mode options and set your strength to around 10%. On the Texture layer, paint over the wrinkles. Go over the area again to strengthen the effect.
Repeat this process to smooth out wrinkles.
Removing Blemishes
Use the Healing Brush tools on the Texture layer for retouching blemishes. Smoothing skin will remove many, but not all blemishes.
You can also use the Spot Removal tool, but the Healing Brush will give you more control.
In the toolbar that appears, create a soft brush by reducing the hardness to about 70% and the spacing to about 30%. Increase the brush size to cover the blemish. You can easily change the brush size by using the bracket keys. “[” will decrease the size. “]” will increase the size.
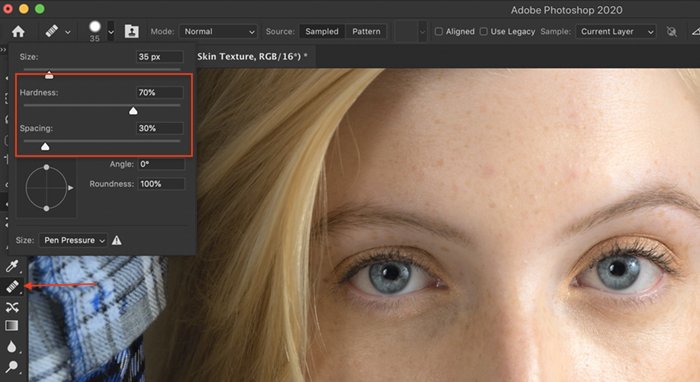
Use the Option (ALT on windows) to select a clean area of skin and then click on the blemish to remove it. It’s best to select skin near the blemish.
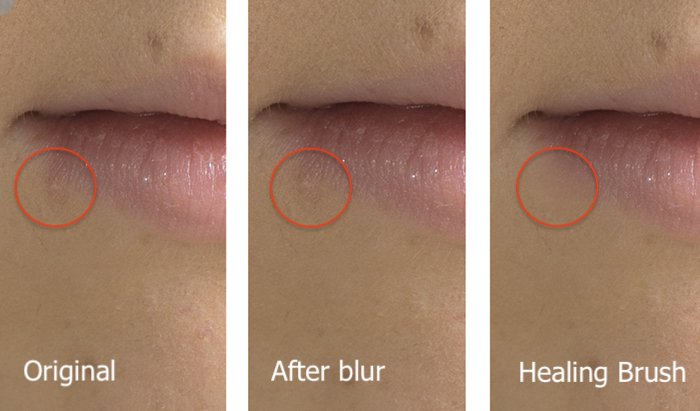
If you decide to use the Clone Stamp Tool instead of the Healing Brush, sample only the Current Layer.

Repeat this process to remove all blemishes.
Because you’re working on the Texture layer, shadows and color on the face won’t be affected.
Lightening Shadows
To lighten shadows, like those that can appear under the eyes, use the Dodge tool on the Shadows & Color layer.
Select the Dodge tool. In the toolbar that appears, select a soft brush. Choose Shadows from the Range box and set your exposure to around 10%.
Paint lightly over the shadow. Go over the area again to strengthen the effect.
You can also use the Blur tool. The icon looks like a water drop. In the toolbar that appears, select a soft brush. Choose Lighten from the Mode options and set your strength to around 10%. On the Texture layer, paint over the wrinkles. Go over the area again to strengthen the effect.
Repeat this process to lighten dark shadows.
Conclusion
Follow these steps for frequency separation:
- Duplicate background layer twice
- Add Gaussian blur to the bottom layer
- Select top layer
- Open Apply Image dialog box
- Enter bottom layer, subtract blending mode, 2 for scale, and 128 for offset
- Click OK
- Change the blend mode of the top layer to Linear Light
- Use the Healing Brush, Spot Removal, or the Clone Stamp tool to fix blemishes in the high frequencies
- Add blur to smooth skin and use the Dodge tool to lighten shadows in the low frequencies
There are a few different ways you can create this frequency separation technique. We found this to be the fastest and easiest to use.
This process separates the low-frequency information from the high-frequency information.
We add blur to the low frequencies to smooth the skin. Use the Apply Image blend recipe described in the article on the high-frequency layer. You can create an action for the setting up the high-frequency layer. But the blur on the low-frequency layer will be different for each image.
Separating high and low frequencies allows you to retouch shadows and colors separately from skin texture.
Practise the frequency separation process until you know it inside out. This is a very helpful tool for photographers who focus on portrait photography.
For all the tips you need to start a portrait photography business, read or eBook – Profit from Portraits!

